Custom Robots.txt Setting For Blogger (Blogspot Blog)
How to set Custom robots.txt specifically for Blogger is the latest blogging tutorial that we will discuss this time. For the Indian version of blogger, this robots.txt setting is written in a special robots.txt. If in the previous post, we have discussed about Custom Robots Header Tags Setting for blogger that I have reviewed in full. And in this tutorial will be discussed about custom robot.txt setting.
If you have read the post then I hope you must be aware of the importance of setting up these robots to get rankings on search pages (google, yahoo, bing, yandex, etc.). And then we will do a complete discussion on how to set robots.txt specifically for this blogger/blogspot.
What is Robots.txt?
Robots.txt is a text file that contains a few simple lines of code. The file is stored on a website or blog server that instructs web crawlers on how to index and crawl the blog in search results.
This means that we can restrict web pages on your blog from web crawlers so that some special pages or posts on the blog can be ordered through that special robot.txt so as not to index unnecessary pages in search engines such as your blog label pages, archive pages or other pages that are not important to index.
Always remember that search bots/crawlers scan your robots.txt file before crawling any webpage. Well, that's why we need to do some robot txt settings specifically for bloggers so that these robots txt can be maximized.
Every blog hosted on blogger has a default robots.txt file that looks like this:
User-agent: Mediapartners-Google
Disallow:

User-agent: *
Disallow: /search
Allow: /

Sitemap: https://blog-name.blogspot.com/sitemap.xml
Robots.txt File Contents Explanation
Now we see the explanation of each text contained in the file above and we describe in order to better understand the function of robots.txt setting to be more SEO.
User-agent: Mediapartners-Google
This code is for the Google Adsense robots that help them display better ads on your blog. Whether you use Google Adsense on your blog, you can just use the code and this will not affect the indexing of posts and pages on your blog.
User-agent: *
This is for all robots marked with an asterisk (*). By default, all types of crawler robots are allowed to index our website. For things that can and cannot be crawled, the code is below.
Disallow: /search
This is a link that has a keyword search right after the domain name will be ignored. See an example below of a label page link called SEO.
http://Phamdom.blogspot.com/search/label/SEOAnd if we remove Disallow: /search from the code above then the crawler will access our entire blog to index and crawl all its content and web pages. Be careful in setting robot.txt specifically for this blogger. Because it will be able to cause the case to be indexed even if blocked by robots txt.
Allow: /
Refers to the Homepage means that web crawlers can crawl and index the homepage of our blog. Then everything related to your homepage will all be accessible.
Disallow Certain Posts
Now suppose if we want to exclude certain posts from indexing then we can add the following line in the code.
Disallow: /yyyy/mm/post-url.htmlHere yyyy and mm refer to the year of publication and month of posting respectively. For example if we have published a post in 2020 in September then we should use the format below.
Disallow: /2020/10/post-url.htmlOr
Disallow: /2020/11/post-seo-optimization-blog.htmlDisallow Custom Pages
If we need to ban a particular page then we can use the same method as above. Just copy the URL of the page and remove the blog address from it which will look like this:
Disallow: /p/page-url.htmlOr if there is more than 1 (one) page that you do not want to be crawled, it can be like this:
Disallow: /p/extensions.html
Disallow: /p/ehaokskski.html
Sitemap
Sitemap: https://blog-name.blogspot.com/sitemap.xml
This code refers to the sitemap of our blog. By adding a sitemap link here we are only optimizing the crawl rate of our blog.
Add Blogger Custom Robots.txt
Now the main part of this tutorial is how to add a custom robots.txt on blogger. So below are the steps to add it.
- Please sign in to Blogger and select the blog for which you want to set header tags.
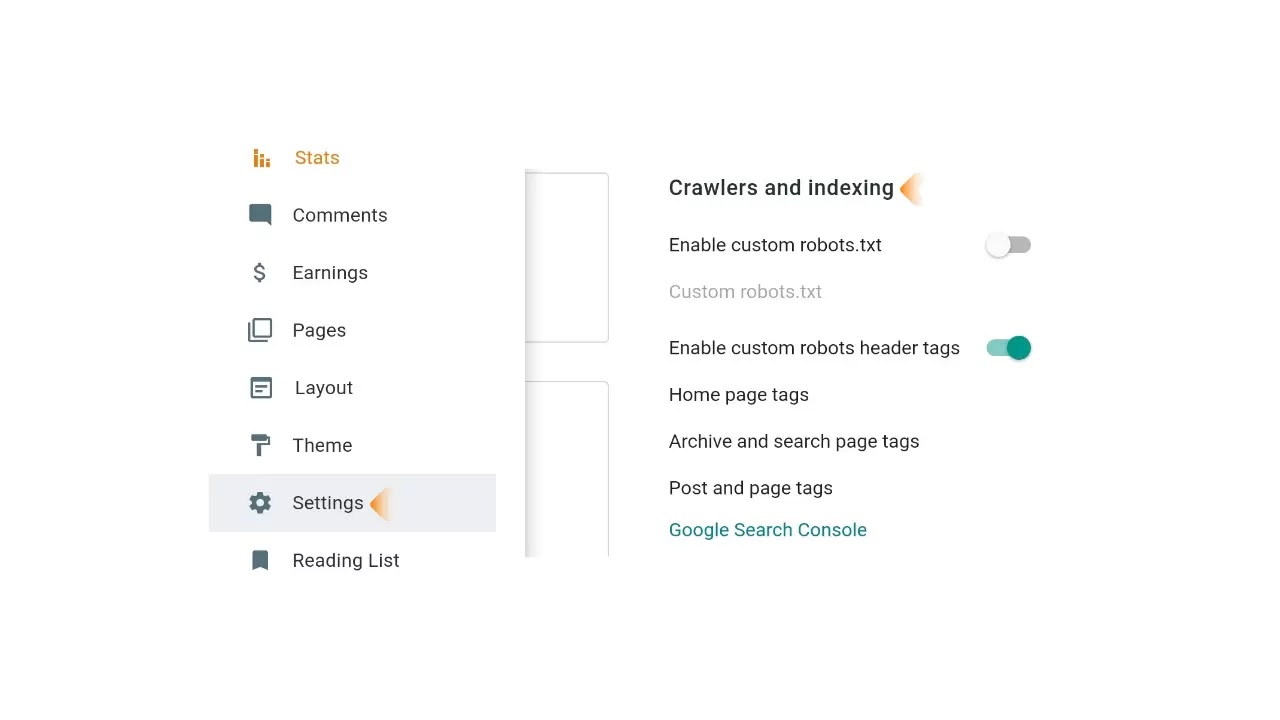
- Then click on Settings and go to Enable custom robots.txt which will be found under "Crawler and Indexing".
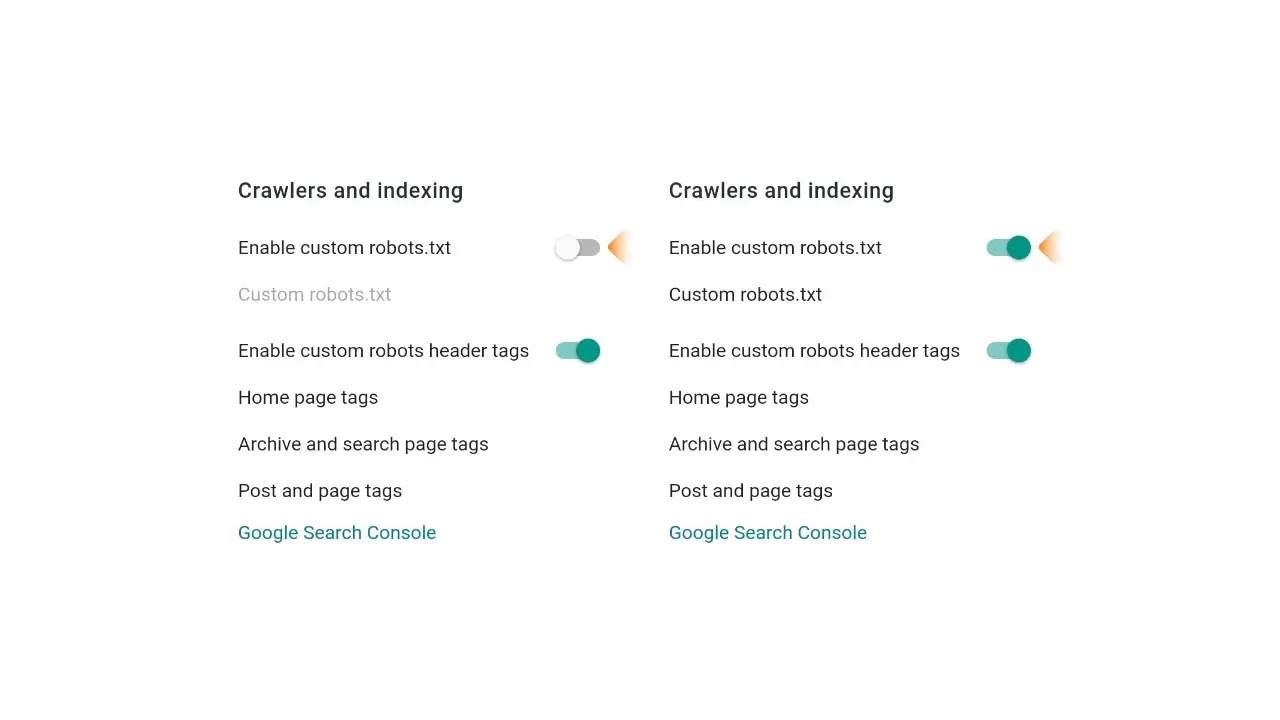
- In this step, you will see the disable button next to the Enable custom robots.txt. Click on that button to enable it.
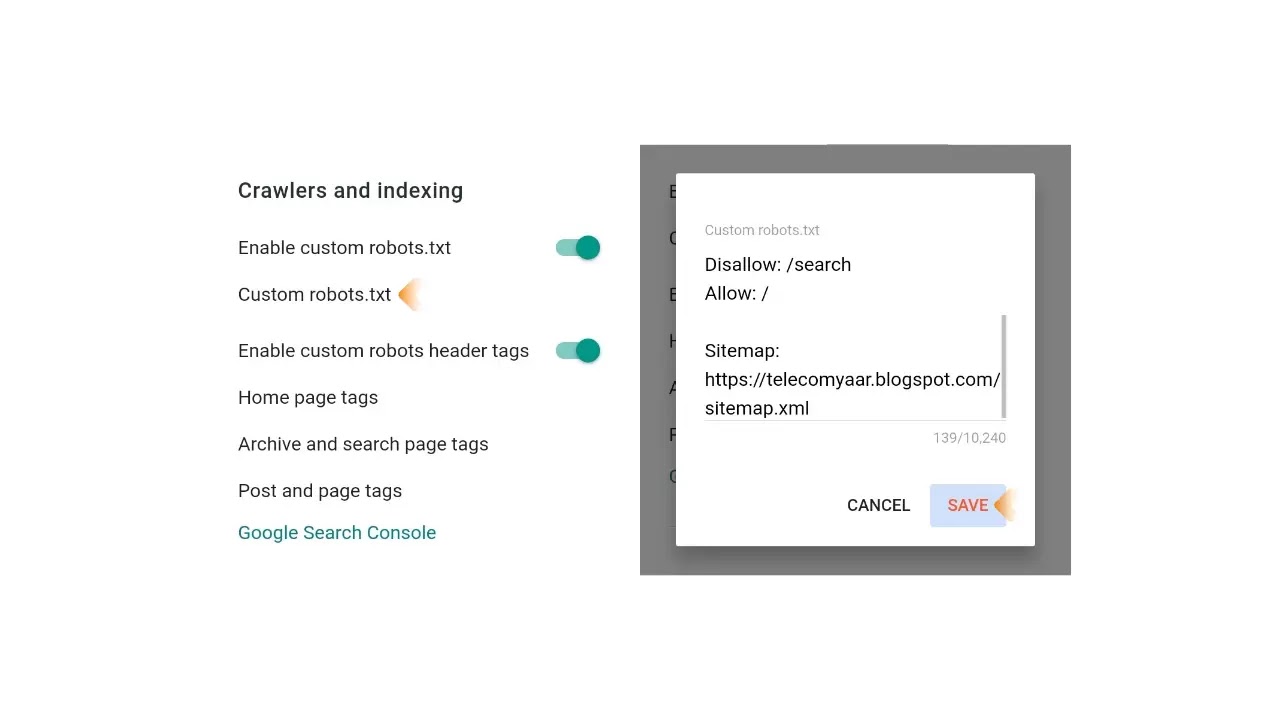
- Now you have to click on custom robots.txt and paste the code below and select the save button.
User-agent: Mediapartners-Google
Disallow:

User-agent: *
Disallow: /search
Allow: /

Sitemap: https://blog-name.blogspot.com/sitemap.xml
Please change the blog address above to yours
How do I Check a Robots.txt File?
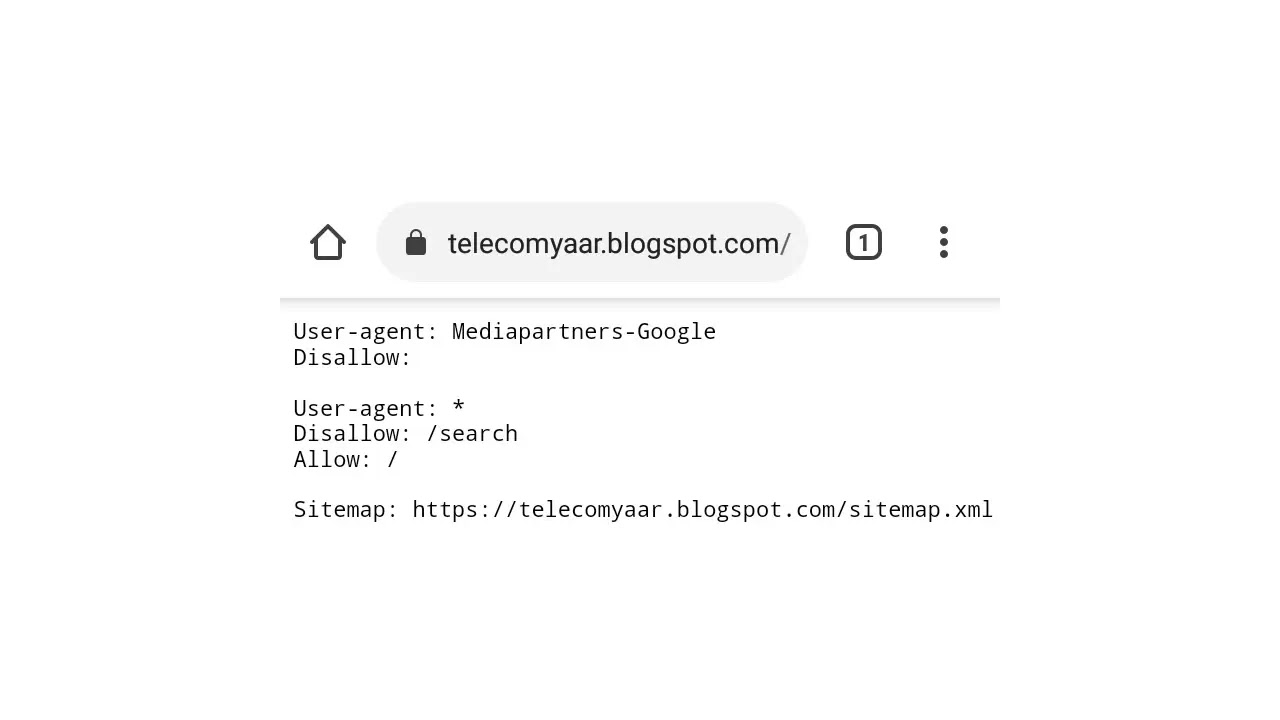
You can check this file on your blog by adding /robots.txt to the end of your blog URL in a web browser. For example:
https://Phamdom.blogspot.com/robots.txtOnce you visit the URL of the robots.txt file that was created, you will see all the code that you used in the blogger-specific robots.txt file. For example let's take an example on my blog that you are reading right now. See the image below.
For additional reference, please read the two posts below:
This is today's complete tutorial on how to add a custom robots.txt file on blogger. Here I try my best to make this tutorial as simple and as informative as possible. But still if you have any doubts or questions then feel free to ask me in the comments section below.
Thus this tutorial is about Custom Robots.txt Settings For Blogger (Blogspot Blog). If you find this post useful, please share it to make it more useful. Thank you.



Komentar
Posting Komentar